


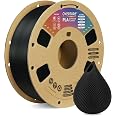
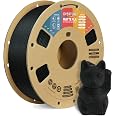
OVERTURE PETG 3D Printer Filament 1.75mm, Neatly Wound Durable PETG 1kg Spool (2.2lbs), Strong Toughness Filament, Dimensional Accuracy +/- 0.02mm, Fit Most FDM Printers (Black (1-Pack))
Details
- BrandOVERTURE
- MaterialPolyethylene
- Color1 Kg Black
- Item Weight1 Kilograms
- Item Diameter1.75

Description
🖤 Print Strong, Print Smart, Print Overture.
- SMOOTH WORKFLOW - Say goodbye to filament tangles thanks to expertly wound spools that keep your prints uninterrupted.
- PRECISION PERFECT - Maintain exacting tolerances with ±0.02mm dimensional accuracy for professional-grade results.
- STRENGTH MEETS EASE - Enjoy ABS-grade toughness with PLA-like printability for flawless functional parts.
- CONFIDENCE GUARANTEED - Backed by lifetime satisfaction service, ensuring your 3D printing journey is worry-free.
- BUILT FOR REAL WORLD USE - Resistant to heat, moisture, and impact—ideal for mechanical components and outdoor projects.
OVERTURE PETG 3D Printer Filament is a 1.75mm, 1kg spool of durable, high-precision PETG material designed for FDM printers. Combining ABS-level strength with PLA-like ease, it offers excellent layer adhesion, low shrinkage, and impact resistance. The filament is neatly wound to prevent tangles and comes in vibrant, fade-resistant colors, supported by a lifetime satisfaction guarantee for reliable, professional-grade 3D printing.
Specifications
| Manufacturer | OVERTURE |
| Brand | OVERTURE |
| Item Weight | 2.2 pounds |
| Package Dimensions | 8.82 x 8.15 x 2.83 inches |
| Item model number | OVPETG175 |
| Color | 1 Kg Black |
| Material Type | Polyethylene Terephthalate Glycol |
| Number of Items | 1 |
| Size | 1.75 mm Diameter, 1 Kg ( 2.2lb ) Spool |
| Manufacturer Part Number | PETG JP A01 |
Reviews
S**.
Print Slow & Hot to Get Maximum Clarity Possible
The media could not be loaded. Overture transparent PETG is widely reputed as among the very best for achieving “glass like” clarity with careful tuning of your slicer settings.Thus, I decided to give it a try on my Bambu Lab X1E.I set a custom filament profile via Bambu Handy, titled “OVERTURE PETG Transparent @ Bambu Lab X1E 0.4 Nozzle”. If I understand correctly, this profile should update to the Bambu cloud so that other users can pick and use the profile for their prints.I started with the “Generic PETG” profile and amended the following:Flow ratio = 1.01Max nozzle temp = 270 deg CNozzle temp = 270 deg C (for initial layer & other layers)Minimum fan speed = 0Maximum fan speed = 0The slicer setting are absolutely essential:Wall loops = 1Top shell loops = 0Bottom shell loops = 0Sparse infill density = 100%Sparse infill pattern = Aligned RectilinearInfill direction = 0 deg (or 90 deg)Change all print speeds to 1/10th the defaults = 20 mm/s for most settingsLayer heights (all) = 0.1 mmLine widths (all) = 0.5 mmSeam = I used “Back” (avoid using ‘Random’)Some design tips: 270 deg C nozzle temp is needed to create the infill to be as solid (unified) as possible, but be careful about avoiding overhangs and bridges as with the cooling turned off completely the filament will droop / sag extensively at such high nozzle temps. Even 45 deg overhangs will not print well. Thus, go with straight walls wherever possible for any that are not directly adjacent to the print plate.Also, keep any walls on your print design as thin as possible … 1 to 3 mm … for the best results. Ensure that there are no mesh errors as these will cause gaps inside the print that obstruct the clarity. Furthermore, orient the object you are printing so that the print direction parallels the longest axis (of the object).Dry the filament for at least 8 hours on the maximum dryer heat setting of 70 deg C for most non-industrial drying units. PETG is extremely hygroscopic and any absorbed moisture will cause bubbles of steam that will cloud the clarity of the print. You can print this filament from the AMS as long as you re-spool it to a plastic spool. Cardboard retains a lot of moisture. Thus, if you put the cardboard spool into your AMS, even with the plastic rims, you’ll end up raising the interior humidity of the AMS.So, how did the print go? Please see the attached video and photos.First, I was amazed at how little stringing occurred at 270 deg C. It did come with over-extrusion artifacts along the seams but that is par for the course for such high nozzle temps. This is why I recommended using the seam profile that creates the least amount of seams, which you can visually confirm in the slicer previews.The bottom wall and layers are amazingly clear. In the attached photos, you can read the text printed on the Overture filament box right through the bottom wall of the print. The side walls of my printed object (a purge chute, waste bin cover) are translucent but more diffuse.If I were to manually polish all the walls of my printed object, I am certain I could achieve “glass like” transparency.So, overall, a good print with excellent results with Overture Transparent PETG on clarity, cleanliness of the print, and its dimensional stability.
J**E
Marble PETG Prints Great on Bambu Lab A1 with Default Settings
Prints Great on my Bambu Lab A1 right out of the box with default "Generic PETG" settings. I also found you don't need a brim, it sticks great to plate without one.
J**Y
The best gold PETG I've found so far
I've tried several gold PETG filaments and this one stands above the rest.The finish resembles gold silk-PLA, but this stuff is significantly less brittle. While it doesn't perfectly mimic real gold, it's the best I've found so far. It's significantly better looking than 3 other brands of gold PETG I've tried.If you want a fairly easy-to-print, attractive, somewhat shiny gold PETG, this is the one to get.
C**R
Great filament just don't expect any transparency
First I want to say overture is my go-to filament. It prints excellent. However the so called transparent PTEG is anything but transparent. It came out more white than anything. Here I compare it to a sunlu PLA print.The right is the PLA and is at least semi transparent where the left is opaque. Both were printed on same printer with similar settings, with temperature being one obvious difference.No the quality of the print, excellent!!! The amount of "transparency" is severely lacking.
A**R
Great Product and Great Service
The items arrived on time and in thoughtful packaging. I have had no issues with this order and would recommend this vendor to other customers.
B**A
Works great
Works great after you fine tune your printer to use it. That took some doing but once that is done.. this stuff was awesome
H**S
Easy to print and strong
Good PETG for the price. It is not too picky on temperature, it prints fine anywhere from 245-255 on my Ender 3 V2. It doesn't bridge very well but that is to be expected for PETG, if you want to bridge I recommend printing at 245 and turning on bridging settings in Cura which makes bridges possible although pretty ugly. Supports work better than bridging, but can be hard to remove because PETG sticks to itself so well.Here are my settings for Ender 3 v2:micro swiss all-metal hotend / original extruder / original bowden tubebltouch leveling probe + yellow springsnozzle 0.4mm 250cbed plain glass + gluestick, 85cfirst layer speed 10speed after first layer 30first layer height: 0.28layer height after first layer: 0.2fan: none unless you are trying to bridge, if so use bridge detection to turn fan 100% only for the bridgeretraction 3mm @ 30I find that the biggest struggle with PETG is just getting the first layer to stick and look good. Once you get past the first layer it is usually smooth sailing. If you have problems with the first layer, first of all dry your filament even if it is brand new. It is an easy way to eliminate frustrations. Also go ahead and calibrate your extruder steps and measure your filament diameter and put that into your slicer, again these are easy steps that ensure you will not be fighting under/over extrusion while you are trying to get everything else figured out. Next use glue stick on plain glass and let the glue stick dry. You want the glass to look dull, not shiny, but it also shouldn't feel sticky to the touch. This combo works great for me, it adheres well but not TOO well and the prints pop themselves off when they cool. Lots of people like hairspray too but gluestick works fine for me and is less messy. Finally the #1 most important thing is to adjust your z offset and first layer height. You cannot mush the filament onto the bed like PLA, it needs to fall out of the nozzle and gently lay down onto the bed. Before doing anything with your z-offset I recommend turning your first layer height up to .28 or .3. The reason is that this sets your nozzle higher AND automatically adjusts the flow rate to match. If you just start bumping your z-offset higher and higher, you will be under-extruding by a lot which can cause its own problems. Once you set your first-layer height to .28, then start printing a test print and live-adjust your Z until the lines lay down and stick to the bed, and are neither gooping up onto the nozzle, nor being hit by the nozzle and pulled off the bed. This is tricky because the sweet spot here is TINY. Like within one or 2 micro-adjustments on the z, either side of that you will have issues. But once you hit the sweet spot on the Z you are golden. Then print some bed leveling test prints and adjust your first layer extrusion multiplier or line width if needed so your lines are touching. I recommend always using the bed level print that is CIRCLES when starting off, not squares. The sharp corners on the squares are super unforgiving and will pop off instantly if your settings aren't right. It is easier to use a bed leveling print with circles to dial your settings in without frustrating yourself and needing to restart the print a hundred times.When printing things over 2" tall I recommend using a wide brim because originally I was using skirt and I have had taller prints pop off the bed right as they are nearly finished, I think the reason is due to the lower part of the print cooling off. A brim is cheap insurance against your whole print being ruined at the last moment, and is easy to remove and leaves little trace that it was ever there.
Common Questions
Trustpilot
1 week ago
4 days ago
